2025年6月

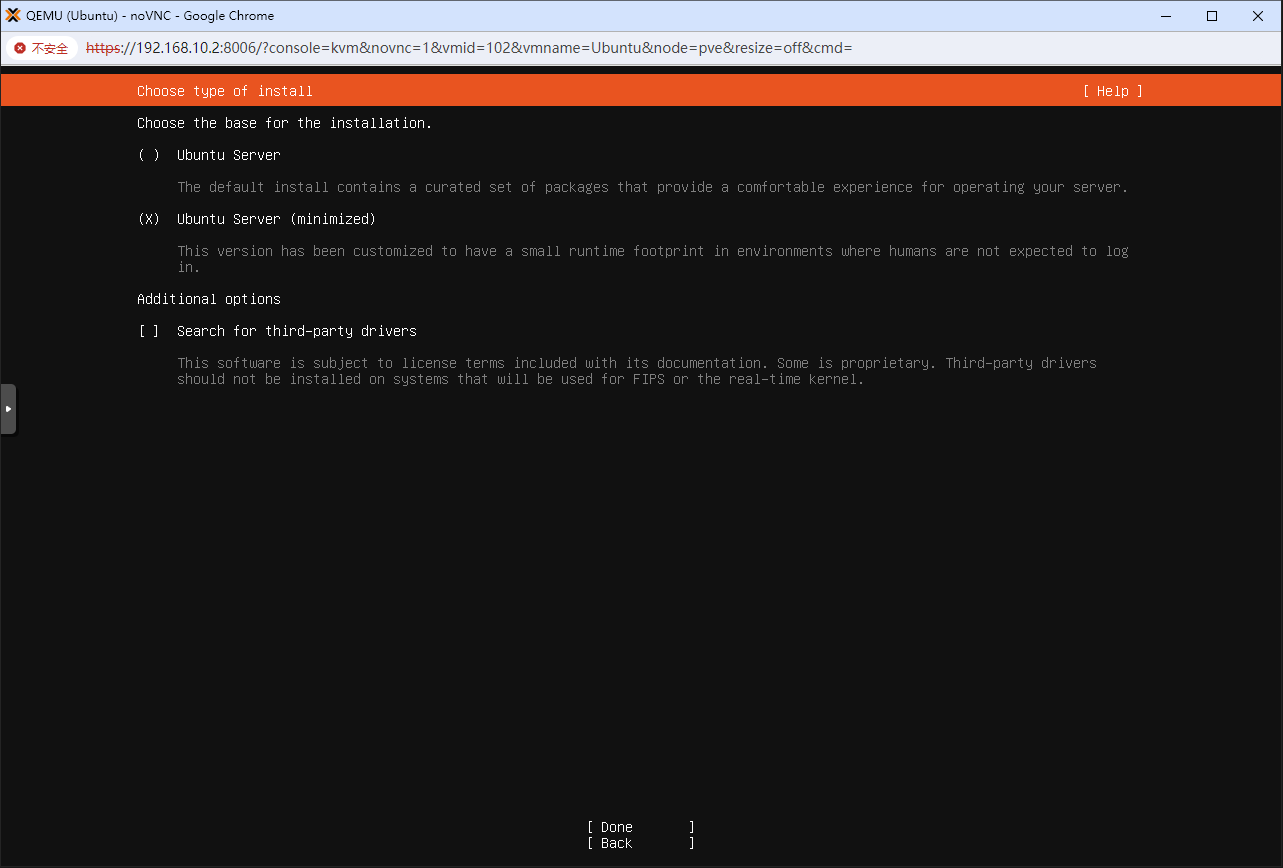
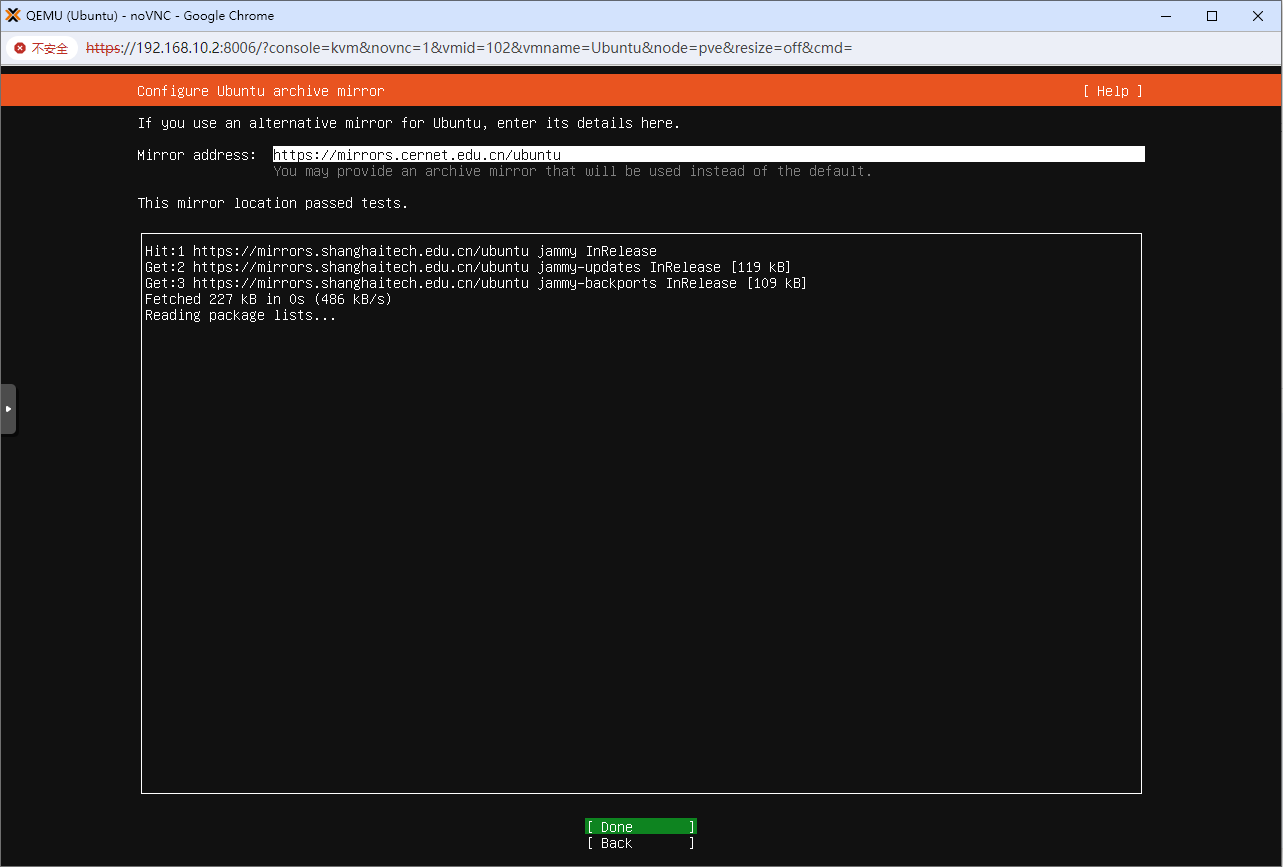
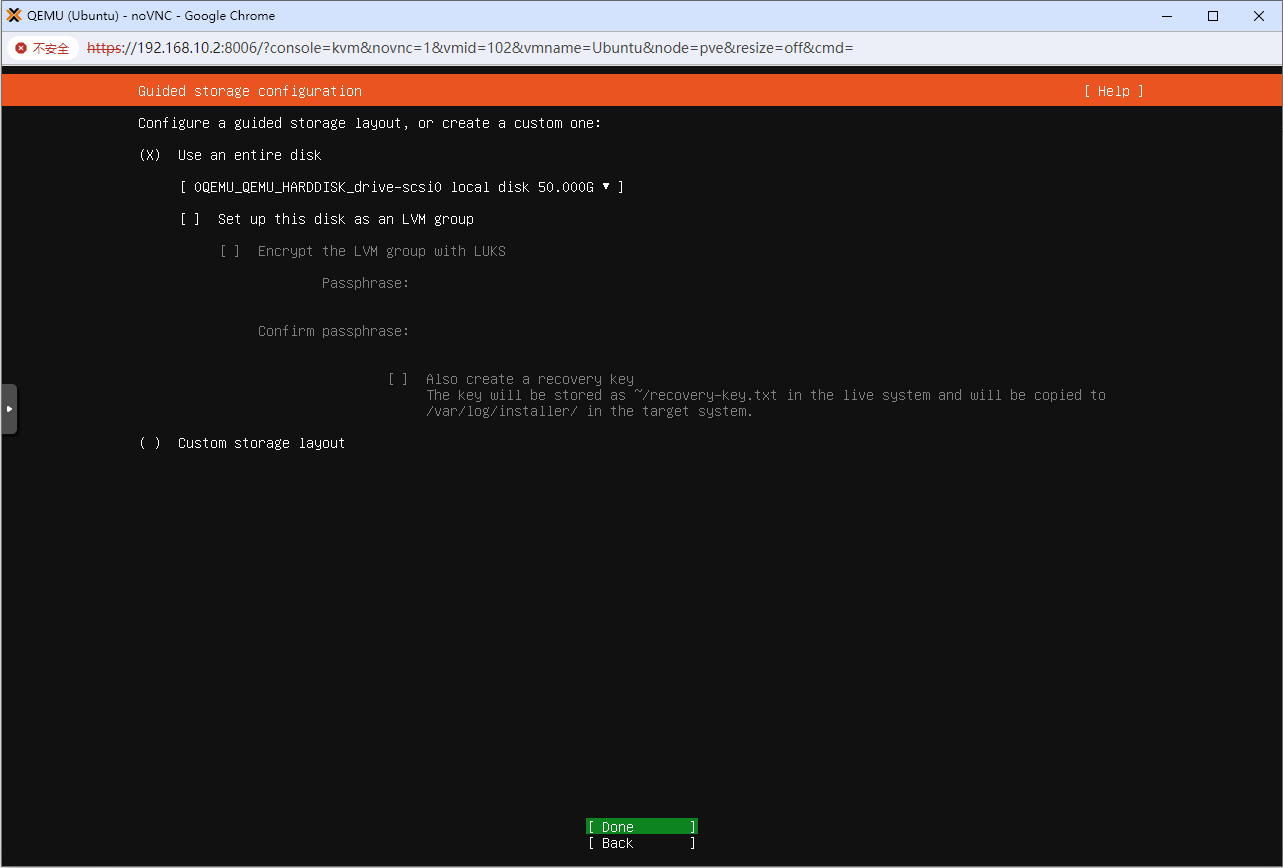
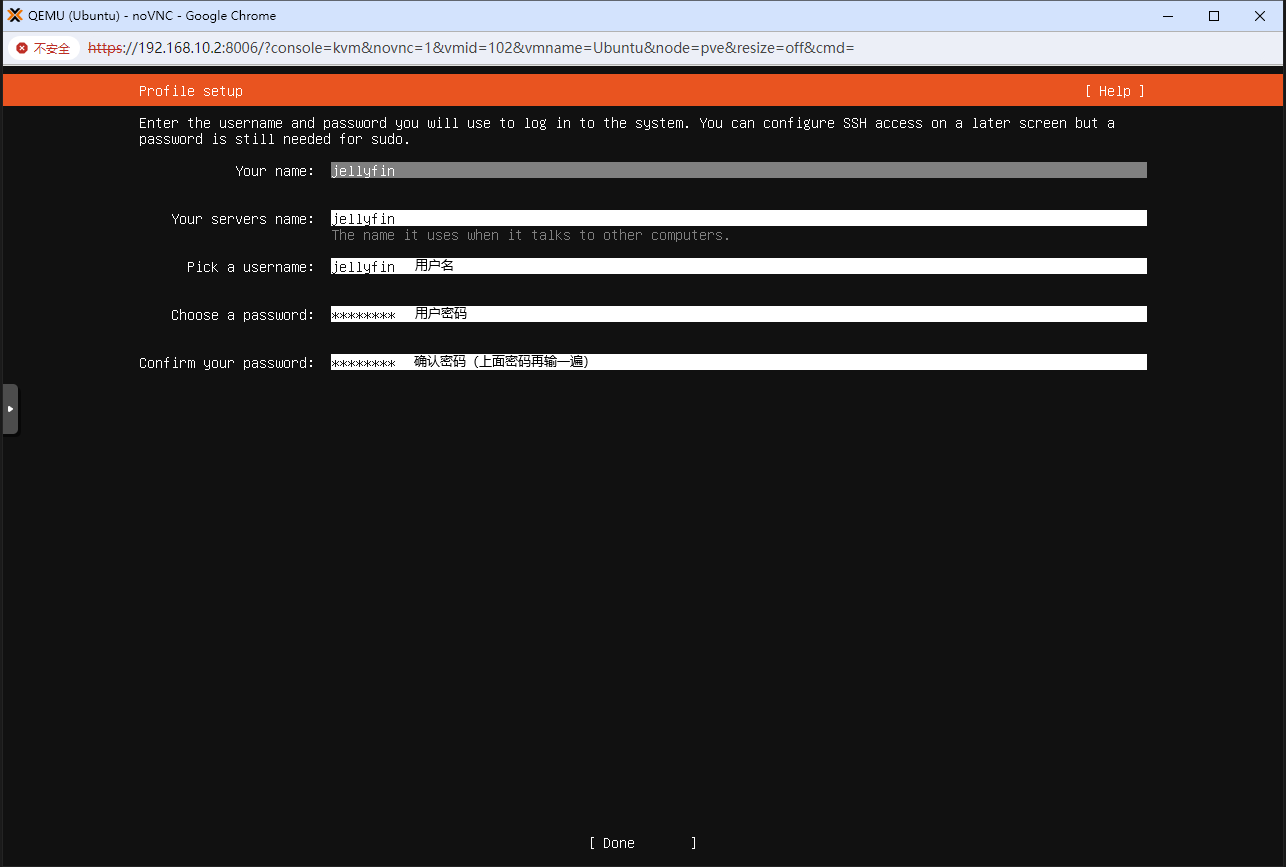
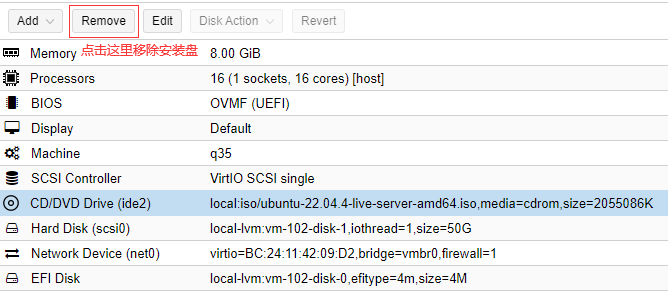
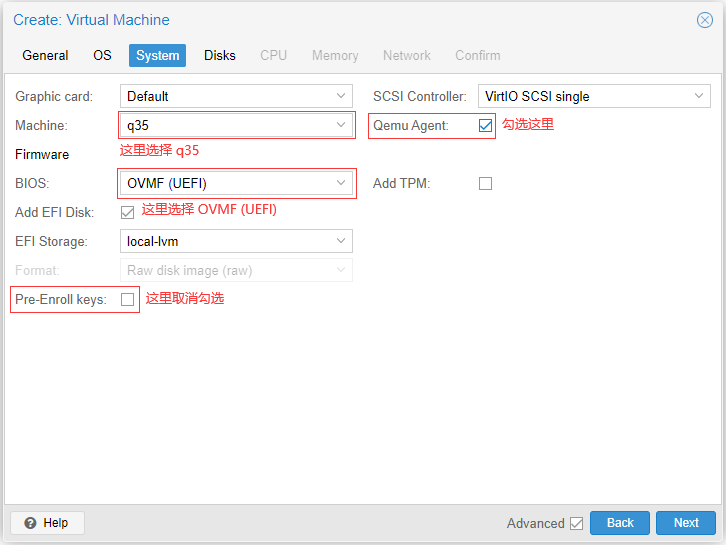
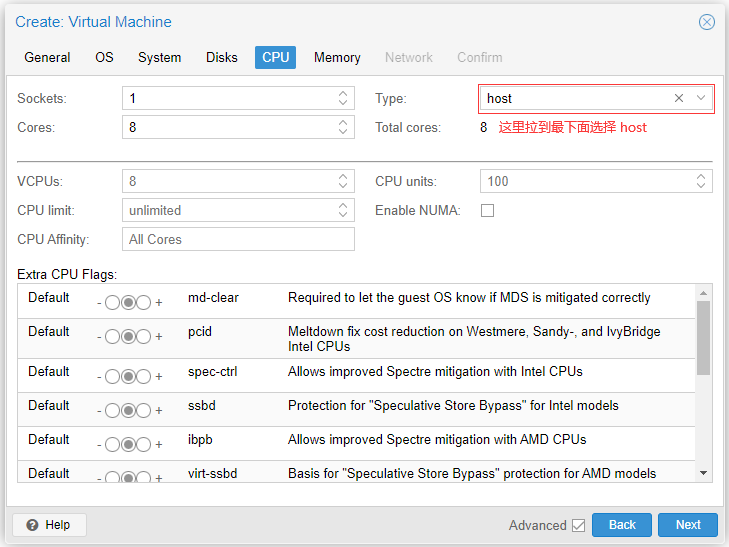
在 PVE 中创建虚拟机,打开高级选项。OS 选择 Ubuntu server 安装镜像,System 里机器选择 q35,BIOS 选择 UEFI 并且取消勾选 Pre-Enroll keys,这样安全启动默认是关闭的。最后勾选 Qemu Agent,开启后管理虚拟机会更方便。
333770419-2c549e24-411e-49ed-91d0-dabd49ea91e2.png
333770421-58ef5624-ff7d-40b1-bd3c-ae65e4c21af8.png
333770427-590c6f4b-738c-4ccd-8a63-b4aa2186c6df.png
333770431-51ff670e-6791-4cbf-986d-0d9ee5a426c9.png
333770435-6c25ee57-e6a5-4b3a-8ae3-c9b8f3e4a236.png
333770439-b98a3380-d822-4aaa-97a2-10258f2ee43c.png

关机

qm stop 101

添加显卡

333770448-5d065ee7-51b0-413f-b116-5ad321162805.png

sudo apt update
sudo apt install qemu-guest-agent dialog bash-completion nano


修改root登录

sudo passwd root

输入密码两次 ,在修改

sudo nano /etc/ssh/sshd_config

PermitRootLogin prohibit-password这行去注释,改为 PermitRootLogin yes

如果 Ubuntu 在安装时选择的是 HWE 内核,那么有可能通过 apt 更新就可以安装 6.8 内核。首先命令行执行 uname -r 查看内核版本号,如果返回结果类似 6.8.0-47-generic,证明已经安装 6.8 内核了,可以跳过这一步。如果返回版本不是,请按照下述步骤安装 6.8 内核。

lspci -nn 查看 DG1 的 PCI ID,这里以华硕圣旗全高 80EU 版本为例,返回值如下:

01:00.0 VGA compatible controller [0300]: Intel Corporation DG1 [Iris Xe Graphics] [8086:4908] (rev 01)

这里 [8086:4908] 前四位是制造商 ID,后四位就是我们需要的 PCI ID。然后修改 /etc/default/grub,找到 GRUB_CMDLINE_LINUX_DEFAULT 这一行,在已有参数后面添加 i915.force_probe=!4908 xe.force_probe=4908,记得新增参数要与原有参数以空格隔开。如果之前内核添加过其他 i915 相关参数(比如 i915.enable_guc=3),请删除,因为不会再使用 i915 内核模块驱动 DG1。

修改完成后保存,执行 sudo update-grub 更新 GRUB 启动文件,然后重启。重启完成后执行 sudo lspci -v 查看 DG1 对应信息:
查看 DG1 对应信息:

01:00.0 VGA compatible controller: Intel Corporation DG1 [Iris Xe Graphics] (rev 01) (prog-if 00 [VGA controller])
        Subsystem: ASUSTeK Computer Inc. DG1 [Iris Xe Graphics]
        Physical Slot: 0
        Flags: bus master, fast devsel, latency 0, IRQ 45
        Memory at 80000000 (64-bit, non-prefetchable) [size=16M]
        Memory at 7000000000 (64-bit, prefetchable) [size=4G]
        Expansion ROM at <ignored> [disabled]
        Capabilities: [40] Vendor Specific Information: Len=0c <?>
        Capabilities: [70] Express Endpoint, MSI 00
        Capabilities: [ac] MSI: Enable+ Count=1/1 Maskable+ 64bit+
        Capabilities: [d0] Power Management version 3
        Capabilities: [100] Latency Tolerance Reporting
        Kernel driver in use: xe
        Kernel modules: i915, xe

如果出现 Kernel driver in use: xe 说明内核已经在使用 xe 内核模块驱动 DG1。驱动完成后就可以使用 Jellyfin 调用 DG1 硬件解码了。

添加第二块网卡,用户挂载飞牛磁盘

nano /etc/netplan/50-cloud-init.yaml

network:
  version: 2
  ethernets:
    ens18:
      dhcp4: true
    ens19:
      dhcp4: false
      addresses:
        - 192.168.172.3/24
      routes:
         - to: 192.168.172.0/24
           via: 0.0.0.0
           metric: 100
      nameservers:
        addresses: [8.8.8.8,114.114.114.114]

内网直接走内网流量
执行完以后执行netplan apply重载网络配置

接下来,安装宝塔,然后挂载 飞牛磁盘

Ubuntu 下安装 Jellyfin 有两种方式,一种是通过 apt 安装官方编译的 deb 包,另一种是使用 docker。这里选择 docker 安装,镜像选择 nyanmisaka 大佬制作的 Jellyfin 中国特供版。

首先查看自己用户和用户组的 ID,命令行输入 id 指令,查看显示的 uid 和 gid 的对应值,这里以两个值均是 1000 为例,请修改为自己机器上的数值。

再查看显卡对应用户组,输入 ls -l /dev/dri/ 指令,查看 renderD128 对应的用户组。这里显示为 render。

total 0
drwxr-xr-x  2 root root         80  5月 24 00:23 by-path
crw-rw----+ 1 root video  226,   0  5月 24 00:23 card0
crw-rw----+ 1 root render 226, 128  5月 24 00:23 renderD128

然后输入指令 getent group render | cut -d: -f3 查看 render 组对应的 ID。这里以 ID 是 110 为例,请修改为自己机器上的数值。

docker run -d \
--name jellyfin \
--user 0:0 \
--group-add="993" \
--net=host \
--add-host=api.themoviedb.org:13.225.174.30 \
--add-host=image.tmdb.org:13.227.73.57 \
--add-host=www.themoviedb.org:54.192.22.105 \
--volume /www/wwwroot/beizhi/jellyfin/config:/config \
--volume /www/wwwroot/beizhi/jellyfin/cache:/cache \
-v /www/wwwroot/nfs:/media \
--restart=unless-stopped \
-p 8096:8096 \
-p 8920:8920 \
--device /dev/dri/renderD128:/dev/dri/renderD128 \
--device /dev/dri/:/dev/dri/ \
 nyanmisaka/jellyfin


  1. 默认路由(Default Gateway)
    默认路由通过 gateway 参数设置,通常与主接口的 IP 配置一起定义。
    示例:静态 IP + 默认网关


auto eth0
iface eth0 inet static
address 192.168.1.100/24
gateway 192.168.1.1   # 默认网关
dns-nameservers 8.8.8.8

  1. 静态路由(Static Routes)
    若需添加特定网络的路由(如访问其他子网或 VPN),需使用 up 或 post-up 命令调用 ip route add。
    2.1 直接在接口配置中定义
    在接口配置块中使用 post-up 添加路由:


auto eth0
iface eth0 inet static
address 192.168.1.100/24
gateway 192.168.1.1
# 添加静态路由:访问 10.0.0.0/8 子网通过 192.168.1.2
post-up ip route add 10.0.0.0/8 via 192.168.1.2


2.2 使用 routes 参数(部分系统支持)

某些版本的 ifupdown 支持 routes 语法(需确认是否可用):


auto eth0
iface eth0 inet static
address 192.168.1.100/24
gateway 192.168.1.1
# 添加路由
routes 10.0.0.0/8 via 192.168.1.2
routes 172.16.0.0/16 via 192.168.1.3

  1. 多接口路由配置
    若系统有多个网络接口(如 eth0 和 eth1),需明确指定路由规则。
    示例:双网卡路由


# 主接口 eth0(默认网关)
auto eth0
iface eth0 inet static
address 192.168.1.100/24
gateway 192.168.1.1
    
# 第二接口 eth1(专用子网)
auto eth1
iface eth1 inet static
address 10.10.0.100/24
# 添加静态路由:访问 10.20.0.0/24 子网通过 10.10.0.1
post-up ip route add 10.20.0.0/24 via 10.10.0.1

  1. 策略路由(高级场景)
    若需基于源地址或策略路由(如多网关),需结合 ip rule 命令。
    示例:基于源 IP 的路由


auto eth0
iface eth0 inet static
address 192.168.1.100/24
post-up ip route add default via 192.168.1.1 table 100
post-up ip rule add from 192.168.1.100 lookup 100

  1. 验证路由配置
    配置完成后,通过以下命令检查路由表:
# 查看完整路由表
ip route show
    
# 查看默认路由
ip route | grep default
    
# 查看特定子网路由
ip route get 10.0.0.1


  1. 配置生效
    6.1 重启网络服务


sudo systemctl restart networking


6.2 重新加载接口


sudo ifdown eth0 && sudo ifup eth0

  
  1. 常见问题
    7.1 路由未生效

    原因:

    语法错误(如 CIDR 格式错误)。
    网关不可达(检查网关 IP 是否有效)。

    解决:

    使用 ifup --force eth0 强制重新加载接口。
    检查日志:journalctl -u networking.service。
    

7.2 路由持久化失败


原因:未在配置文件中正确使用 post-up。
解决:确保路由命令在接口配置块中定义。
  1. 完整示例
    场景
    主接口 eth0:IP 192.168.1.100/24,默认网关 192.168.1.1。
    第二接口 eth1:IP 10.10.0.100/24,需访问子网 10.20.0.0/24 通过网关 10.10.0.1。
    配置文件


# 默认回环接口
auto lo
iface lo inet loopback
    
# 主接口 eth0(默认路由)
auto eth0
iface eth0 inet static
address 192.168.1.100/24
gateway 192.168.1.1
dns-nameservers 8.8.8.8
    
# 第二接口 eth1(专用子网路由)
auto eth1
iface eth1 inet static
address 10.10.0.100/24
post-up ip route add 10.20.0.0/24 via 10.10.0.1


一、备份现有apt源配置

mv /etc/apt/sources.list /etc/apt/sources.list.old

二、替换为其他apt源
1、替换为默认官方源

这是一条命令,全部复制后,直接粘贴然后一起执行。

cat > /etc/apt/sources.list << EOF
deb https://deb.debian.org/debian/ bookworm main contrib non-free non-free-firmware
deb-src https://deb.debian.org/debian/ bookworm main contrib non-free non-free-firmware
deb https://deb.debian.org/debian/ bookworm-updates main contrib non-free non-free-firmware
deb-src https://deb.debian.org/debian/ bookworm-updates main contrib non-free non-free-firmware
deb https://deb.debian.org/debian/ bookworm-backports main contrib non-free non-free-firmware
deb-src https://deb.debian.org/debian/ bookworm-backports main contrib non-free non-free-firmware
deb https://deb.debian.org/debian-security bookworm-security main contrib non-free non-free-firmware
deb-src https://deb.debian.org/debian-security bookworm-security main contrib non-free non-free-firmware
EOF

2、替换为清华源

这是一条命令,全部复制后,直接粘贴然后一起执行。

cat > /etc/apt/sources.list << EOF
deb https://mirrors.tuna.tsinghua.edu.cn/debian/ bookworm main contrib non-free non-free-firmware
deb-src https://mirrors.tuna.tsinghua.edu.cn/debian/ bookworm main contrib non-free non-free-firmware
deb https://mirrors.tuna.tsinghua.edu.cn/debian/ bookworm-updates main contrib non-free non-free-firmware
deb-src https://mirrors.tuna.tsinghua.edu.cn/debian/ bookworm-updates main contrib non-free non-free-firmware
deb https://mirrors.tuna.tsinghua.edu.cn/debian/ bookworm-backports main contrib non-free non-free-firmware
deb-src https://mirrors.tuna.tsinghua.edu.cn/debian/ bookworm-backports main contrib non-free non-free-firmware
deb https://mirrors.tuna.tsinghua.edu.cn/debian-security bookworm-security main contrib non-free non-free-firmware
deb-src https://mirrors.tuna.tsinghua.edu.cn/debian-security bookworm-security main contrib non-free non-free-firmware
EOF

3、替换为中科大源

这是一条命令,全部复制后,直接粘贴然后一起执行。

cat > /etc/apt/sources.list << EOF
deb https://mirrors.ustc.edu.cn/debian/ bookworm main contrib non-free non-free-firmware
deb-src https://mirrors.ustc.edu.cn/debian/ bookworm main contrib non-free non-free-firmware
deb https://mirrors.ustc.edu.cn/debian/ bookworm-updates main contrib non-free non-free-firmware
deb-src https://mirrors.ustc.edu.cn/debian/ bookworm-updates main contrib non-free non-free-firmware
deb https://mirrors.ustc.edu.cn/debian/ bookworm-backports main contrib non-free non-free-firmware
deb-src https://mirrors.ustc.edu.cn/debian/ bookworm-backports main contrib non-free non-free-firmware
deb https://mirrors.ustc.edu.cn/debian-security/ bookworm-security main contrib non-free non-free-firmware
deb-src https://mirrors.ustc.edu.cn/debian-security/ bookworm-security main contrib non-free non-free-firmware
EOF

4、替换为腾讯云源

这是一条命令,全部复制后,直接粘贴然后一起执行。

cat > /etc/apt/sources.list << EOF
deb https://mirrors.tencent.com/debian/ bookworm main non-free non-free-firmware contrib
deb-src https://mirrors.tencent.com/debian/ bookworm main non-free non-free-firmware contrib
deb https://mirrors.tencent.com/debian-security/ bookworm-security main
deb-src https://mirrors.tencent.com/debian-security/ bookworm-security main
deb https://mirrors.tencent.com/debian/ bookworm-updates main non-free non-free-firmware contrib
deb-src https://mirrors.tencent.com/debian/ bookworm-updates main non-free non-free-firmware contrib
deb https://mirrors.tencent.com/debian/ bookworm-backports main non-free non-free-firmware contrib
deb-src https://mirrors.tencent.com/debian/ bookworm-backports main non-free non-free-firmware contrib
EOF

使用腾讯云服务器时,可以选择腾讯云内网源,走内网不消耗公网流量。
5、替换为阿里云源

这是一条命令,全部复制后,直接粘贴然后一起执行。

cat > /etc/apt/sources.list << EOF
deb https://mirrors.aliyun.com/debian/ bookworm main non-free non-free-firmware contrib
deb-src https://mirrors.aliyun.com/debian/ bookworm main non-free non-free-firmware contrib
deb https://mirrors.aliyun.com/debian-security/ bookworm-security main
deb-src https://mirrors.aliyun.com/debian-security/ bookworm-security main
deb https://mirrors.aliyun.com/debian/ bookworm-updates main non-free non-free-firmware contrib
deb-src https://mirrors.aliyun.com/debian/ bookworm-updates main non-free non-free-firmware contrib
deb https://mirrors.aliyun.com/debian/ bookworm-backports main non-free non-free-firmware contrib
deb-src https://mirrors.aliyun.com/debian/ bookworm-backports main non-free non-free-firmware contrib
EOF

使用阿里云服务器时,可以选择阿里云内网源,走内网不消耗公网流量。
6、替换为Linode源(不支持HTTPS)

这是一条命令,全部复制后,直接粘贴然后一起执行。

cat > /etc/apt/sources.list << EOF
deb http://mirrors.linode.com/debian/ bookworm main non-free non-free-firmware contrib
deb-src http://mirrors.linode.com/debian/ bookworm main non-free non-free-firmware contrib
deb http://mirrors.linode.com/debian-security/ bookworm-security main
deb-src http://mirrors.linode.com/debian-security/ bookworm-security main
deb http://mirrors.linode.com/debian/ bookworm-updates main non-free non-free-firmware contrib
deb-src http://mirrors.linode.com/debian/ bookworm-updates main non-free non-free-firmware contrib
deb http://mirrors.linode.com/debian/ bookworm-backports main non-free non-free-firmware contrib
deb-src http://mirrors.linode.com/debian/ bookworm-backports main non-free non-free-firmware contrib
EOF


解决https报错的问题

apt install apt-transport-https ca-certificates